How to Inspect and Seal Your RV Roof Before Camping Season
A few hours on your roof in April can prevent a repair bill that runs into the thousands. Water damage is the leading cause of serious RV deterioration in Atlantic Canada, and the roof is where almost every leak begins. Sealant dries out and cracks over winter. Seams separate. Screw heads lift just enough to let moisture work its way through the membrane and into the decking below. By the time a stain appears on the ceiling or a soft spot develops in the floor, water has usually been present for months.
The good news is that inspecting and sealing an RV roof is a job most owners can handle themselves with the right products and a couple of hours. This guide explains how to identify your roof type, what to look for during the inspection, which sealants and tapes to use, and how to apply them correctly so the repair lasts all season.
What it actually costs to skip this step
Before getting into the how-to, it is worth understanding what you are protecting against. A failed lap sealant bead around a roof vent or AC base lets water track along the decking and insulation before it ever drips into the living space. By the time you see interior damage, the decking may already be soft, the insulation saturated, and the interior walls stained. Repairs at that stage often involve removing interior panels, replacing decking, treating them for mould, and refinishing surfaces. That level of damage is not something that can be fixed in a weekend.
A tube of Dicor lap sealant costs less than $20. The time investment for a full inspection and reseal is two to three hours. That comparison is worth keeping in mind.

Start with an interior check before you get on the roof
Walk through the trailer before climbing. Look at the ceiling around every vent, skylight, and roof penetration. Open cabinets that sit below roof fixtures and check the undersides for water stains or discoloration. Press lightly on ceiling panels near vents and the AC unit. Any flex or softness suggests moisture has already made its way in.
Note any musty smell in enclosed spaces. Check the walls around the front cap and rear corners of the trailer, where flexing during travel puts the most stress on roof seams. Document what you find before going up so you know exactly where to look first.
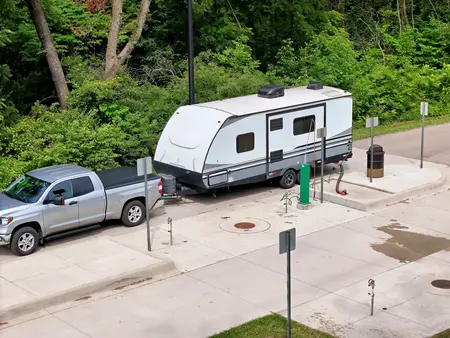
Know your roof type before buying anything
Using the wrong sealant on a roof can cause worse adhesion failures than the original issue. The four roof types you will find on travel trailers and RVs in Atlantic Canada are:
EPDM rubber is the most common material on travel trailers built in the past three decades. It has a matte, slightly textured white surface and feels like a thick rubber sheet. If you remove the inner vent garnish from inside your trailer and look up, you will find the underside of the roof is black; that is a reliable way to confirm you have an EPDM membrane. EPDM is compatible with Dicor and Alpha Systems lap sealants and with EPDM-specific rubber roof coatings like the Heng's Elixir line and Dicor rubber roof coatings. Dicor lap sealant is one of the most versatile products, as it works on almost any RV roof material.
TPO (thermoplastic polyolefin) is increasingly common on newer units. It is also white but has a smoother, slightly shinier finish than EPDM. Sika Multiseal Plus roof tape bonds exceptionally well to TPO surfaces and is a reliable repair option for this material.
Fibreglass is found on higher-end units and some older trailers. It is rigid, glossy, and does not flex the way rubber membranes do. Dicor Lap Sealant works well on fibreglass roof surfaces to seal penetrations, screwheads, and seams. TremPro 645 white silicone is better suited to the vertical walls around the trailer, mouldings, vents, doors, and windows, where a silicone-based product handles those surface types and movement characteristics more effectively.
PVC roofing is less common but still found on some travel trailers. Like EPDM and TPO, PVC roofs can be sealed with Dicor lap sealant, making the same self-levelling and non-sag products applicable for penetrations, seams, and screw heads.
If you are unsure of your trailer's roof material, check the owner's manual or look up your model year and manufacturer. You can also verify roofing material specifications through the RV Industry Association at rvia.org, which maintains compliance records for member manufacturers.
What to bring up on the roof
Keep it simple. You need:
- A soft-bristled brush and cloths for cleaning
- A plastic putty knife or scraper for removing old sealant
- A caulking gun and your chosen lap sealant
- Roof tape for larger damaged areas
Wear soft-soled shoes and walk along the roof's frame rails, not on the membrane directly, and never step on vent covers, skylights, or the AC housing.
Step 1: Clean the roof thoroughly
You cannot do a proper inspection on a dirty roof. Road grime, algae streaks, and debris obscure cracking sealant and small punctures.
Rinse with a garden hose, then clean with a rubber roof-safe cleaner. Avoid petroleum-based products on EPDM, as they degrade the membrane over time. Magic Boss rubber roof cleaner, stocked at The Trailer Guys, is a reliable choice for safely cleaning EPDM roofs before inspection or product application. It preps the surface effectively and leaves no residue that would interfere with sealant or coating adhesion. Let the roof dry completely before inspecting or applying any product.
Step 2: Inspect every penetration and seam
Every point where something sits on or passes through the roof is a potential entry point for water. Work systematically through each one:
- Roof vents and fan covers
- Antenna mounts and cable entry points
- Skylight frames
- Vent pipe flashings
- Exposed screw heads along seams and edges
- Drip caps and gutter spouts
- Front and rear roof-to-wall seams
Run your finger along every existing bead of sealant. Healthy sealant is flexible and bonds tightly to both the roof membrane and the fixture it seals. Sealant that needs replacing will feel stiff or brittle, crack when pressed, have visible gaps along its edges, or show discoloration from water sitting underneath.
Do not apply new sealant over old cracked sealant. It will not bond through the failed material. Use a plastic scraper to remove the old bead first, clean the surface with a rubber roof cleaner or rubbing alcohol, and then apply fresh sealant to a clean surface.
Step 3: Apply the right sealant for each location
Lap sealant comes in two formulas, and the right one depends on where you are applying it.
Self-levelling lap sealant is for horizontal and flat surfaces. It flows slightly after application, filling gaps and levelling itself out around screw heads, vent bases, and flat seam edges. Dicor self-levelling lap sealant is the standard choice for most EPDM, TPO, fibreglass, and PVC roofs and is available in white and tan at The Trailer Guys. Alpha Systems self-levelling (also stocked in white and black) is another compatible option for EPDM roofs.
Non-sag lap sealant is for vertical and angled surfaces where the product needs to hold position after application. Use this sealant on the vertical edges of skylights, sidewall trim, and any angled surface where self-levelling would run. Dicor non-sag and Alpha Systems non-sag are both available at The Trailer Guys in white and black.
Cut the caulking tube tip at a 45-degree angle, load it into the gun, and apply a continuous bead. Use a wet finger or plastic tool to smooth it out and ensure full contact with both surfaces. Allow 24 to 48 hours of dry time before rain exposure.
Step 4: Use roof tape for larger damaged areas
Where sealant alone is not enough, such as for tears in the membrane, larger seam separations, or patches over old repair areas, roof tape provides a flexible, adhesive membrane that bonds directly to the roof surface and moves with it as temperatures change.
Sika Multiseal Plus roof tape is stocked at The Trailer Guys in widths from 2 inches up to 12 inches. It is a TPO-membrane tape rated for EPDM, TPO, fibreglass, and most other RV roofing materials. UV-resistant and tear-proof, it handles Atlantic Canada's freeze-thaw cycles without lifting.
To apply correctly, first clean and fully dry the area. Then cut the tape with at least 2 inches of overlap on all sides of the damaged zone. Next, peel the backing and press firmly from one end, working out air bubbles. Finally, run a bead of lap sealant along all four edges of the tape to seal the perimeter. Corner tape in 1-1/4-inch and 2-inch widths is also available for sealing corners where flat seams meet vertical surfaces.
Step 5: Decide if a full roof coating is needed
If the EPDM membrane shows widespread surface chalking, fine cracking across a broad area, or visible UV degradation beyond what spot repairs can address, a full rubber roof coating is the right move.
A roof coating is a liquid-applied product that rolls or brushes over the entire membrane surface. It restores UV protection, seals micro-cracks before they become open seams, and significantly extends the working life of the existing rubber. It is not a replacement for sealant work at penetrations, but it is the right product when the membrane itself is aging.
Heng's Elixir Rubber Roof Coating is available at The Trailer Guys in 1-quart and 1-gallon sizes. The gallon covers a standard travel trailer roof in one coat. Dicor Rubber Roof Acrylic Coating is also stocked for larger applications. Use Magic Boss rubber roof cleaner to prep the surface before applying either product to ensure proper adhesion. Browse the full roof coating selection here.
Step 6: Check vent covers and skylights while you are up there
Plastic vent covers and skylight frames become brittle from UV exposure over time. A cracked cover is an easy water entry point that most owners miss because it does not look like a roof problem.
Press around the edge of each cover. Any that flex, wobble, crack under light pressure, or show significant yellowing should be replaced before the season starts. Check the roof vent covers and lids section at The Trailer Guys for replacements.
How often does an RV roof need to be resealed?
Plan on inspecting lap sealant at least once a year. Spring before the camping season is the right time to catch anything that failed over winter, and a quick check in fall before storage lets you address anything that cracked through the summer.
In Atlantic Canada, the combination of summer UV, fall rain, and winter freeze-thaw cycles puts more stress on roof sealant than in milder climates. If the sealant feels stiff and does not flex when pressed, it should be replaced before the next camping season, not left until it fails completely.
Frequently asked questions
Can I use regular silicone caulk on an EPDM roof?
No. Standard silicone does not bond reliably to rubber membranes, and it can actually prevent future EPDM-compatible products from adhering if you ever try to redo the repair. Use Dicor or Alpha Systems lap sealant on EPDM and TPO roofs. Reserve silicone products, like TremPro 645, for fibreglass vertical wall applications, mouldings, vents, doors, and windows.
How do I know if my sealant needs replacing?
Press on it. Good sealant is flexible and springy. Sealant that cracks, separates from the surface, or crumbles at the edges has failed and should be replaced.
Can I inspect and seal my RV roof, or do I need a professional?
Most travel trailer owners can handle inspection and basic resealing themselves. The tools required are minimal, and the products are straightforward to apply. If you find soft decking beneath the membrane, large areas of membrane separation, or any signs of structural water damage, bring the trailer in for a professional assessment. The Trailer Guys offer in-person service at their 745 Route 133 location in Boudreau Ouest, and the team is also reachable by phone or text if you want a second opinion before deciding how to proceed.
What products do I need for a full RV roof inspection and reseal?
At minimum: a rubber roof cleaner, a tube of lap sealant matched to your roof type (self-levelling for flat surfaces, non-sag for vertical), and roof tape for any larger repairs. Browse everything you need in the RV roof maintenance collection at The Trailer Guys.
Recent articles
View all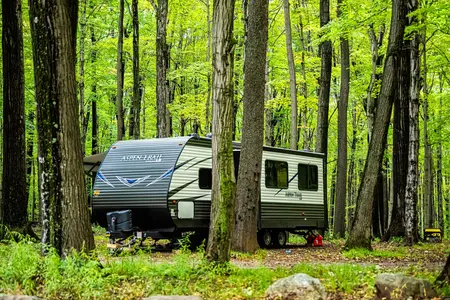
Spring RV Setup: How to Check Your Sewer System Before Your First Trip
Common RV Sewer Problems and How to Prevent Them